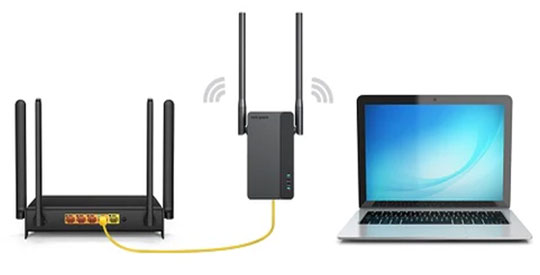
The only possible way to access the internet via the Rockspace range extender after completing the setup process is to connect to Rockspace_ext. But, some users state that they cannot connect to the extender’s network after the Rockspace WiFi extender setup process. In case you have also got your name mentioned in the list of those users then we first recommend you to refresh your network list and check if you are successful this time. Else, you know what to do now.
Update the Firmware of the Extender First
Just in case you are wondering how to complete the firmware update when you cannot even access the extender’s network, then know that you can use the Ethernet cable for the direct connection. Just cable your computer or laptop to the WiFi router and access the login portal of the range extender via the default IP address. Once done, you are required to follow the points given below:
- Input the password and username of the extender into their respective spaces.
- Hit Log In.
- You will soon see the Rockspace extender dashboard.
- Time to load a new tab now! So, click the “+” icon above the address field.
- Go to the Rockspace official website and download the firmware file that corresponds to the Rockspace product you own.
- Once done, move to the tab where you’ve just accessed the extender’s dashboard.
- Over there, find the Firmware Update option under the Maintenance tab.
- Now, you need to upload the firmware file on the next window and wait.
Let your extender reboot as a part of the firmware update process and check the network list on any client device. Try to connect to Rockspace_ext now. Any luck or not? If you are still facing problems, then we have some more tips to follow.
Solved: Can’t Connect to Rockspace_Ext
1. Get in the Extender’s Range: You might have not paid attention but there are chances that you are trying to connect to the extender’s network outside the range where it can propagate signals effortlessly. You cannot expect your devices to get connected when they cannot even communicate properly. Therefore, we suggest you get a little closer to the range extender and try to access its WiFi network again. We hope that you succeed this time.
2. Experiment with the Extender’s Placement: Reading this hack is a clear sign that you’ve not resolved the issue yet. But, worry not! You can now try your hands on relocating the range extender. There are times when a networking device like Rockspace range extender fails to provide the user the facilities offered by its functions due to poor placement. The only solution you have left with in this scenario is to make some changes with the extender’s location. You need to place it in an area free of WiFi interference.
3. Restart the Range Extender: Sometimes, the Rockspace range extender becomes a victim of network errors that can result in minor issues like the one you are currently struggling with. Well, getting rid of them is easier than you think. You just need to give some rest to your extender. How will you do that? The answer is simple, keep the extender powered down for a decent time and let the magic unfold.
These were some basic tips that if implemented can help you out if you can’t connect to Rockspace_ext. Although they will work in your favor, still you should not find yourself in a tough spot if the issue denies stepping back. In that scenario, you should reset the range extender and install it once again via re.rockspace.local. Check out the next section to learn the instructions to reset the Rockspace device.
How to Reset Rockspace Extender?
Find the Reset button on the range extender after ensuring that it is connected to a functional socket.
With the help of an oil pin or a similar pointed object, press the Reset button inside the hole present with the same label.
Keep the button pressed for 10-15 seconds.
As soon as you release the button, the extender will reset and you can set it up again.
After completing the setup process, you will be all set to access the internet on your client devices after connecting them to Rockspace_ext.

